What to Do After Landing in Sri Lanka – Complete Colombo Airport Arrival Guide
The excitement of visiting a new country begins long before the flight takes off.
For us, Sri Lanka wasn’t just another international trip. It was a destination we’d been planning for months. Beautiful beaches, scenic train rides, lush tea plantations, wildlife, friendly people and delicious food—it had everything we were looking for.
But before enjoying all of that, there’s one question every traveller has.
“What should I do after landing in Sri Lanka?”
That’s exactly why we created this Colombo Airport Arrival Guide. When we were planning our trip, we watched dozens of YouTube videos and read several blogs, but very few explained what actually happens after landing at Colombo Airport. From visa checks and immigration to getting a local SIM card, exchanging currency and booking your first cab, this guide covers everything we experienced to help you start your Sri Lanka trip with confidence.
When we were planning our trip, we watched dozens of YouTube videos and read many blogs. Surprisingly, most of them only talked about places to visit, while very few explained what actually happens after your flight lands at Bandaranaike International Airport (Colombo Airport).
Questions like these kept running through our minds.
- Do I need a visa before travelling?
- Is immigration difficult?
- Should I exchange money at the airport?
- Which SIM card should I buy?
- Is Uber available?
- Can I drive in Sri Lanka with my Indian driving licence?
If you’re travelling to Sri Lanka for the first time, don’t worry.
In this Colombo Airport Arrival Guide, we’re sharing our exact experience—from the moment we booked our tourist visa until we stepped out of Colombo Airport. We’ll also cover practical tips, common mistakes to avoid, and useful information we wish we’d known before our trip.
If you’re reading this before your flight, this Colombo Airport Arrival Guide will help you know exactly what to expect after landing in Sri Lanka and make your arrival completely stress-free.
Before You Fly – Apply for Your Sri Lanka Tourist Visa
One of the first things we did after booking our flights was apply for the Sri Lanka Electronic Travel Authorization (ETA).
Thankfully, the process was much easier than we expected.
The most important thing to know is this:
Always apply through the official Sri Lankan Government website.
There are many websites that look almost identical to the official portal. Some even appear at the top of search results and charge service fees that can be several times higher than the actual visa cost.
We’ve seen many travellers accidentally pay these unnecessary charges simply because they clicked the wrong website.
To avoid that mistake, always use the official ETA website:
Sri Lanka ETA Official Website
The ETA is issued by Sri Lanka’s Department of Immigration & Emigration.
Is the Sri Lanka Tourist Visa Free?
This depends on your nationality.
At the time of writing, Indian passport holders and citizens of several other eligible countries can obtain a 30-day tourist ETA free of charge, but you still need to apply online before travelling. Immigration rules and eligible countries can change, so always verify the latest information on the official ETA website before booking your trip.
If your nationality isn’t included in the free visa program, the official website will display the applicable fee during the application process.
Applying for the ETA Was Surprisingly Easy
Honestly, we expected the visa application to take quite some time.
Instead, it was a straightforward online process.
We filled in our passport details, travel information, and a few basic personal details before submitting the application.
The website was simple to navigate, and the whole process took only a few minutes.
Once approved, we downloaded a copy of the ETA confirmation and also saved it on our phones.
Even though immigration officers often have access to your ETA electronically, carrying a printed or digital copy is always a good idea.
Technology doesn’t always cooperate when you’re standing at an airport.
Documents We Carried
Even though Sri Lanka is considered a relatively easy country to enter for tourists, we didn’t want to take any chances.
We carried both printed and digital copies of:
- Passport
- Sri Lanka ETA approval
- Return flight ticket
- Hotel booking confirmations
- Travel insurance
- A rough itinerary
Did the immigration officer ask us for all of these?
No.
But travelling with these documents gave us peace of mind.
It’s always better to have them and not need them than the other way around.
Finally… We Landed in Sri Lanka 🇱🇰
After a comfortable flight, our aircraft touched down at Bandaranaike International Airport (BIA) near Colombo.
The moment the wheels touched the runway, that familiar excitement kicked in.
“We’re finally in Sri Lanka.”
As the aircraft taxied towards the terminal, we could already see other international airlines parked nearby.
A few minutes later, the cabin crew opened the aircraft doors.
Like everyone else, we grabbed our cabin bags and walked out with huge smiles on our faces.
Our Sri Lankan adventure had officially begun.
Walking Through the Terminal
After leaving the aircraft, we entered the Terminal Concourse, sometimes called the Boarding Concourse or Gate Area.
This is the long corridor that connects arriving passengers to immigration.
The airport felt clean, bright and easy to navigate.
There were clear English signboards directing everyone towards Immigration and Baggage Claim, so even first-time international travellers shouldn’t have any trouble finding their way.
As we walked through the terminal, we could hear a mix of different languages.
Families returning home.
Backpackers beginning their holiday.
Couples excitedly planning their itinerary.
It was a reminder that Sri Lanka attracts travellers from all over the world.
Within a few minutes, we reached one of the places many first-time international travellers worry about the most.
Immigration.
Immigration at Colombo Airport – Easier Than We Expected
If you’re feeling nervous about immigration, let us reassure you—our experience was smooth, well-organised, and surprisingly quick. That’s one of the reasons we wanted to include this section in our Colombo Airport Arrival Guide, as immigration is often the part first-time travellers worry about the most.
When we entered the immigration hall, there were already several queues.
For a brief moment, we thought,
“This might take a while.”
But the queues moved continuously because there were plenty of immigration officers processing passengers at different counters. Compared to some international airports where a single officer handles a long line of travellers one by one, Colombo Airport felt much more efficient.
One thing we genuinely appreciated was how they handled families.
Instead of asking us to go separately, the immigration officer invited both of us to the counter together. It made the process quicker, more comfortable, and less stressful.
The officer simply checked:
- Our passports
- Our Sri Lanka ETA
- A few basic details on the computer
He then smiled, stamped our passports, and welcomed us to Sri Lanka.
The entire interaction took less than a couple of minutes.
We weren’t asked to show our return flight tickets, hotel bookings, or proof of funds. However, that doesn’t mean you shouldn’t carry them.
As part of any Sri Lanka Airport Guide, we’d strongly recommend keeping all your important travel documents—such as your passport, ETA approval, return ticket, hotel reservations, and travel insurance—easily accessible in your cabin bag. Immigration officers can request additional documents at their discretion, and having everything organised can save you unnecessary stress.
From our experience, immigration at Colombo Airport was one of the easiest parts of entering Sri Lanka, making it a great start to our trip.
Our First Impression of Colombo Airport
Before arriving, we weren’t sure what to expect.
But our first impression was genuinely positive.
The airport wasn’t overly complicated.
The staff were helpful.
The signboards were clear.
Immigration was efficient.
Most importantly, everything felt relaxed rather than chaotic.
That immediately gave us confidence that the rest of our Sri Lanka trip was off to a great start.
Collecting Our Luggage – The First Real Step Into Sri Lanka
After completing immigration, we followed the “Baggage Claim” signs towards the luggage collection area.
One thing we liked about Colombo Airport was how easy it was to navigate. The signboards were clear, well placed, and available in English, so there was very little chance of getting lost. If you’re travelling for the first time, this Colombo Airport Arrival Guide should reassure you that finding the baggage claim area is straightforward.
Within a few minutes, we reached the baggage hall, where several conveyor belts were already running. Like most international airports, electronic display boards clearly showed which baggage belt corresponded to each arriving flight.
Fortunately, our luggage arrived safely, although we had to wait around 15–20 minutes before the first bags appeared on the conveyor belt.
Instead of feeling impatient, we simply took the opportunity to look around and soak in the excitement.
After months of planning, we were finally standing in Sri Lanka, and the reality that our holiday had officially begun slowly started to sink in.
If your luggage takes a little longer than expected, don’t panic. Since multiple international flights often arrive around the same time, waiting 15–30 minutes for checked baggage is completely normal at Colombo Airport.
As part of this Sri Lanka Airport Guide, we’d recommend keeping your baggage claim tag handy until you’ve collected all your luggage. Although it’s rare, airport staff may occasionally ask you to verify your baggage tag before you leave the arrival area, especially if there are similar-looking suitcases on the conveyor belt.
Once we had our luggage, we were ready for the next step—exploring the duty-free shops and officially entering the arrival hall.
Don’t Miss the Duty-Free Shops
As we continued following the signs after collecting our luggage, one thing that immediately caught our attention was the number of duty-free shops inside Bandaranaike International Airport (Colombo Airport).
Many travellers assume duty-free shopping is only available before departure, but one thing we discovered during our trip—and wanted to include in this Colombo Airport Arrival Guide—is that Colombo Airport also has a dedicated duty-free shopping area for arriving passengers.
If you enjoy shopping or forgot to buy something before your trip, it’s worth taking a few minutes to explore the stores before leaving the airport.
You’ll find a wide variety of products, including:
- 🍫 Premium chocolates
- 💄 Perfumes and cosmetics
- ⌚ Watches
- 📱 Electronics and gadgets
- 🥃 Liquor (within the duty-free allowance)
- 🚬 Cigarettes and tobacco products
- 🎁 Souvenirs
- 🎒 Travel accessories
We personally didn’t spend much time shopping because we wanted to reach our hotel before evening and start exploring Sri Lanka. However, we did notice that the prices on certain products—especially chocolates, perfumes and liquor—looked quite competitive compared to regular retail stores.
If you’re planning to purchase alcohol during your trip, buying it from the airport duty-free shop is usually one of the most convenient options before travelling to other parts of the country.
💡 Our Tip
If shopping isn’t one of your priorities, don’t spend too much time here. As you’ll see throughout this Sri Lanka Airport Guide, there are still a few important things to complete before leaving the airport, such as exchanging money, buying a local SIM card, arranging transport, or applying for a temporary driving permit if you plan to drive in Sri Lanka.
Our recommendation is simple: take a quick look around, buy only what you really need, and then continue with the essentials so you can start enjoying your Sri Lankan adventure as soon as possible.
Customs Check – Easier Than We Expected
After collecting our luggage and taking a quick look around the duty-free shops, we made our way towards the Customs area.
If you’re travelling internationally for the first time, the word “Customs” can sound a little intimidating. Before our trip, we weren’t entirely sure what to expect either. But as you’ll see throughout this Colombo Airport Arrival Guide, many of the airport procedures in Sri Lanka turned out to be much simpler than we had imagined.
For us, the customs process was quick and hassle-free.
We placed our luggage on the X-ray scanner, walked through the designated exit, and within just a couple of minutes, we were officially inside the arrivals section of Colombo Airport.
The customs officers were professional, polite, and the entire process felt well organised.
Since we were carrying only our personal travel belongings, we weren’t asked any additional questions or selected for further inspection.
However, it’s worth remembering that customs procedures can vary depending on what you’re carrying. If you’re travelling with expensive electronics, large amounts of cash, commercial goods, or items that require declaration, you may be asked for additional checks or documentation.
For most tourists arriving with regular holiday luggage, though, the customs process is usually straightforward and completed within a few minutes.
Welcome to the Arrival Hall!
The moment we stepped through the final doors, we officially entered the Arrival Hall.
This is where your Sri Lanka trip truly begins.
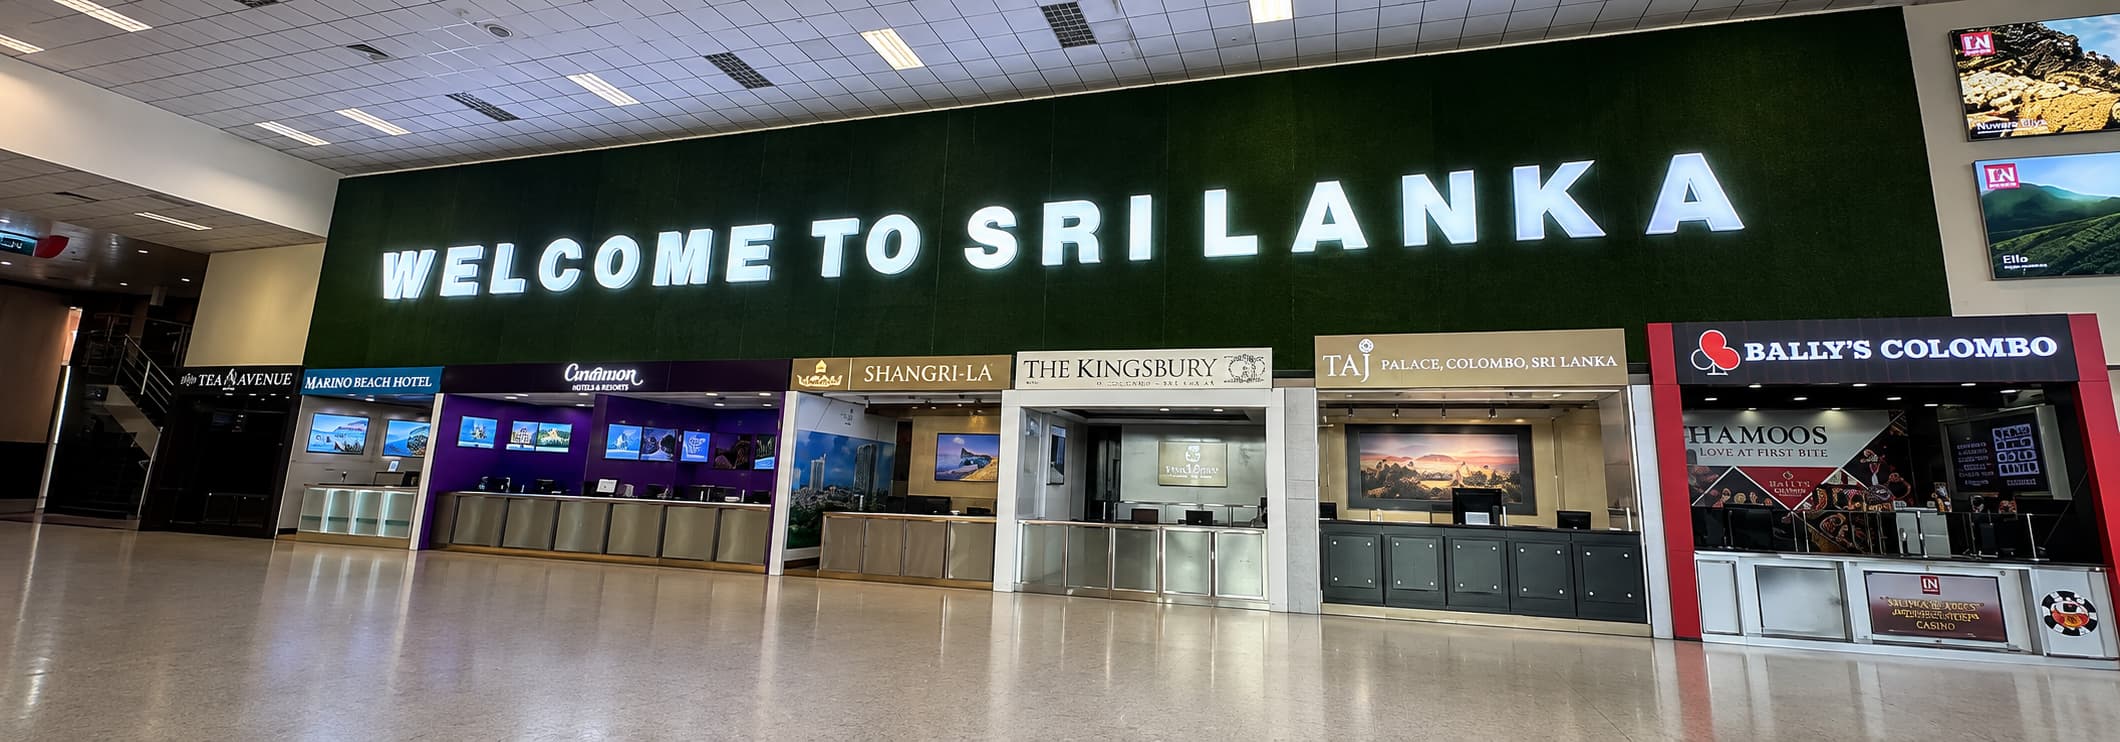
You’ll immediately notice several counters and service desks offering:
- Currency exchange
- ATM machines
- Mobile SIM cards
- Taxi bookings
- Car rental services
- Tourist information
It might feel slightly overwhelming at first because there are many options in one place.
Don’t rush.
Take a few minutes to decide what you need first.
For us, there were three priorities:
- Get Sri Lankan Rupees.
- Buy a local SIM card.
- Book transport to our hotel.
Everything else could wait.
Should You Exchange Money or Use an ATM?
One of the biggest questions we had before travelling to Sri Lanka was about money.
Should we carry cash from India?
Should we exchange currency at Colombo Airport?
Or should we simply withdraw Sri Lankan Rupees (LKR) from an ATM after landing?
If you’re wondering the same thing, you’re not alone. In fact, this is one of the most common questions travellers ask, which is why we wanted to cover it in this Colombo Airport Arrival Guide.
After researching online, watching travel videos, and finally experiencing it ourselves, we realised there isn’t a single correct answer.
The best option depends on which currency you’re carrying, the cards you have, and your travel preferences.
As part of this Sri Lanka Airport Guide, we’ll explain both options, share what we personally chose, and help you decide which one makes the most sense for your trip.
From our experience, both currency exchange counters and international ATMs at Colombo Airport are convenient, so you don’t have to worry about finding local currency after you land. The important part is understanding which option gives you the best value based on your situation.
Option 1 – Currency Exchange
If you’re carrying major international currencies like US Dollars (USD), Euros (EUR), or British Pounds (GBP), the airport exchange counters generally offer competitive rates.
Many travellers avoid airport exchange counters because they’re expensive in some countries.
Sri Lanka is a little different.
The exchange rates at Colombo Airport are often quite reasonable, making it perfectly acceptable to exchange at least some money immediately after arrival.
That gives you enough local currency for transport, food and other small expenses.
Option 2 – Withdraw Cash From an ATM
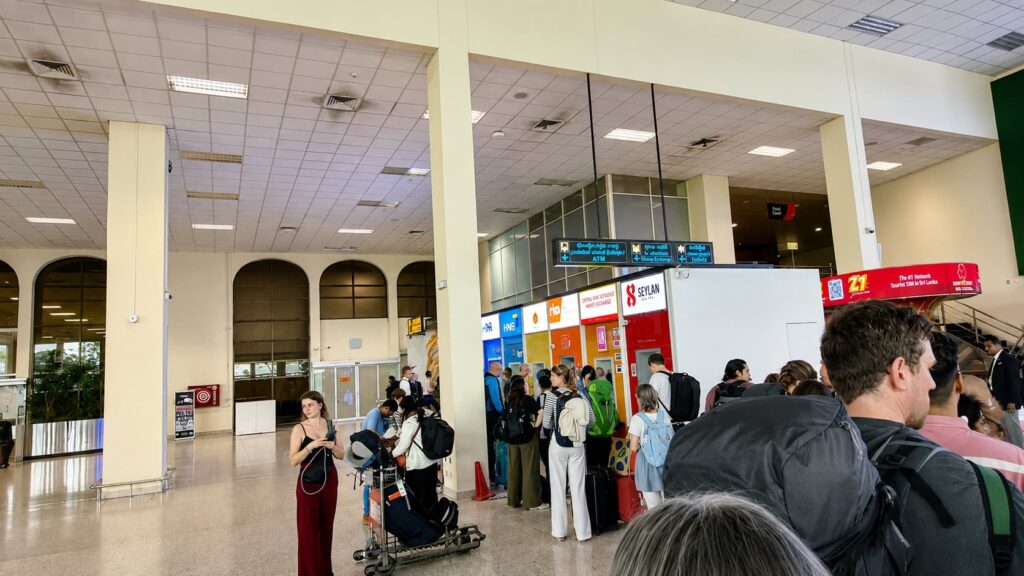
This is the option we chose.
There are several ATM machines inside the arrival area that accept international debit and credit cards.
Within a few minutes, we had Sri Lankan Rupees in our hands.
The only downside?
When several international flights arrive together, the ATM queues can become quite long.
We had to wait for a while before our turn.
If you arrive during peak hours, don’t be surprised if there are 10–20 people waiting.
Our advice is simple.
Be patient.
You’ll save time later because you’ll already have local cash before leaving the airport.
How Much Cash Should You Withdraw?
One thing we weren’t sure about before travelling was how much cash we should withdraw after landing in Sri Lanka.
Would we need cash everywhere?
Or could we simply use our international debit and credit cards throughout the trip?
After spending several days travelling across the country, we found that the answer lies somewhere in between.
As we mentioned earlier in this Colombo Airport Arrival Guide, Sri Lanka has become much more digital in recent years. Most hotels, supermarkets, larger restaurants, and shopping malls accept international cards, making cashless payments quite convenient in major tourist areas.
The amount of cash you should carry also depends on your travel style, trip duration, and daily expenses. If you’re unsure how much budget you’ll need for your Sri Lanka trip, you can use our free Travel Budget Calculator to estimate your total travel expenses based on your itinerary before you fly. It only takes a minute and gives you a much clearer idea of how much cash to carry and how much you can comfortably pay by card.
👉 Try our free Travel Budget Calculator:
https://oursweetescape.com/travel-budget-calculator/
However, cash is still extremely useful—and sometimes essential—for everyday expenses such as:
- 🛺 Tuk-tuk rides
- ☕ Small cafés
- 🍛 Local restaurants
- 🍢 Street food stalls
- 🛍️ Small souvenir shops
- 🎟️ Entrance tickets at certain attractions
- 🚌 Public transport
Instead of withdrawing a large amount immediately, we recommend taking out enough cash for your first two or three days. That’s exactly what we did, and it worked perfectly.
Once we started exploring Sri Lanka, we realised that international ATMs were easily available in major tourist destinations like Colombo, Kandy, Ella, Mirissa, Galle, and Nuwara Eliya. This meant we could simply withdraw more money whenever we needed it instead of carrying a large amount of cash throughout the trip.
Buying a Local SIM Card – One of the Best Decisions We Made
The next thing on our list was getting internet access.
Could we have used an international eSIM before travelling?
Absolutely.
But after comparing prices, we realised that buying a local Sri Lankan SIM card would give us much better value.
The counters are located immediately after customs, so they’re impossible to miss.
Several mobile operators are available, but one name stood out everywhere.
Dialog.
Why We Chose Dialog
Before travelling, we had already read dozens of reviews from travellers.
Almost everyone recommended Dialog because of its strong network coverage across Sri Lanka.
Since our itinerary included:
- Colombo
- Mirissa
- Galle
- Ella
- Nuwara Eliya
- Kandy
…we wanted a provider that would continue working reliably even in the hill country.
After using it throughout our trip, we’re happy to say it performed really well.
Whether we were navigating with Google Maps, uploading Instagram stories, booking hotels or checking train timings, we rarely experienced any connectivity issues.
If you’re visiting Sri Lanka for the first time, Dialog is the SIM card we’d personally recommend. Community experiences also consistently rank Dialog among the best choices for nationwide coverage.
How Much Does a Dialog Tourist SIM Cost?
Dialog offers dedicated Tourist SIM plans that are activated using your passport.
At the time of writing, some of the popular plans are:
- LKR 1,399 – 20 GB data + local call credit
- LKR 1,799 – 30 GB data + local call credit
- LKR 2,450 – 50 GB data + unlimited WhatsApp + local call credit
These plans can change over time, so it’s always worth checking the latest offers before you travel.
We found the prices to be much cheaper than using international roaming or many third-party travel eSIM providers.
Expect a Queue at the Dialog Counter
If you’ve decided to buy a Dialog Tourist SIM, there’s one thing you should be prepared for—a queue.
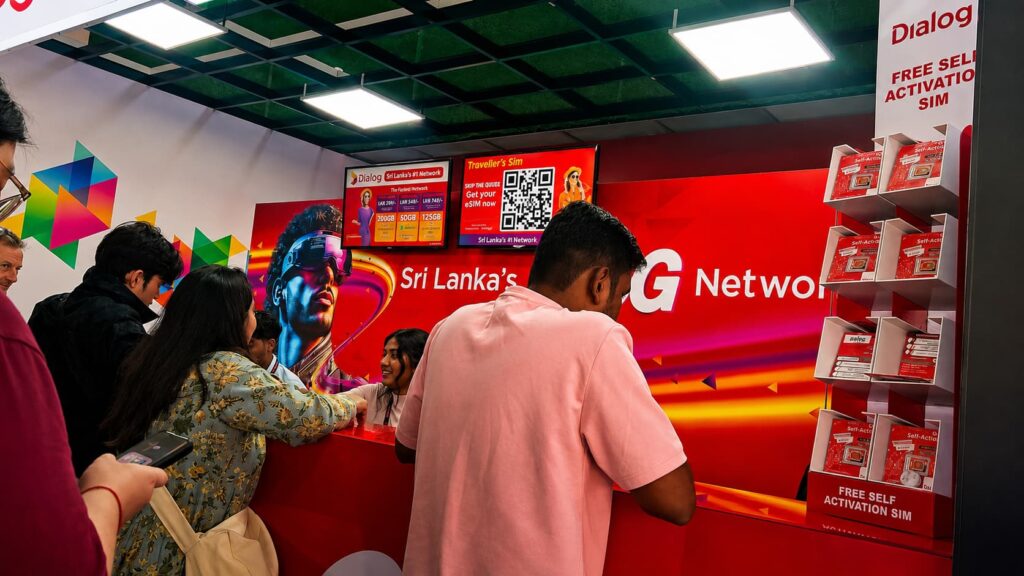
During our visit, this was probably the busiest counter inside the arrival hall.
Because Dialog is one of the most popular mobile networks in Sri Lanka, most international travellers head straight to their counter after clearing customs. As we mentioned earlier in this Colombo Airport Arrival Guide, if multiple international flights land around the same time, it’s completely normal to see a long line of people waiting to buy their SIM cards.
Fortunately, the queue moved much faster than we expected.
The staff worked efficiently, and once it was our turn, the entire process took only a few minutes.
They asked for our passport, activated the Tourist SIM on the spot, inserted it into our phone, configured the mobile data settings, and even tested the internet connection before handing the phone back to us.
We didn’t have to adjust any settings ourselves, which was a pleasant surprise after a long flight.
The best part?
By the time we walked out of the airport, Google Maps, WhatsApp, Uber, PickMe, and all our essential travel apps were already working perfectly.
That meant we could immediately book our ride, contact our hotel, check directions, and even let our family know that we had landed safely.
💡 Our Tip
As part of this Sri Lanka Airport Guide, we’d recommend buying your SIM card at the airport itself rather than waiting until you reach the city. The prices are reasonable, the activation is completed on the spot, and having mobile data from the moment you leave the terminal makes your journey much more convenient and completely stress-free.
Looking back, buying the Dialog Tourist SIM was one of the smartest decisions we made on our very first day in Sri Lanka.
Renting a Car or Scooter? Read This Before Leaving the Airport
One of the reasons we love travelling is the freedom to explore at our own pace.
No waiting for buses.
No rushing to catch trains.
Just stopping whenever you find a beautiful beach, a hidden café or an incredible viewpoint.
If you’re planning to rent a car or scooter in Sri Lanka, there’s one important thing you need to know before leaving Colombo Airport.
Your home country’s driving licence alone is not enough.
Many travellers only discover this when they reach the rental company, and it can completely disrupt their plans.
Thankfully, Sri Lanka has made the process much easier for tourists.
Getting a Temporary Sri Lankan Driving Licence at Colombo Airport
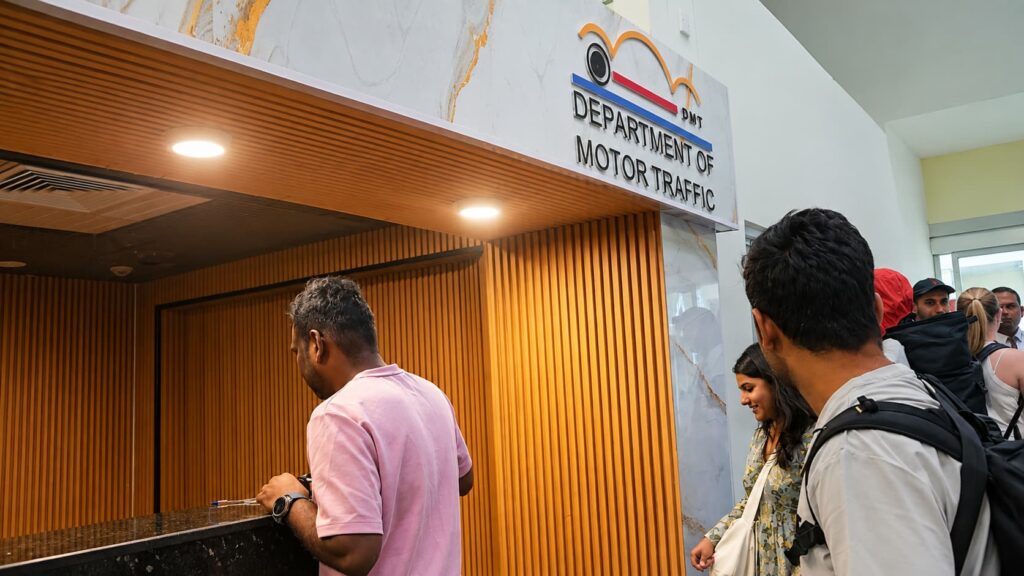
Foreign tourists can now obtain a temporary Sri Lankan driving licence directly at Bandaranaike International Airport after landing. The Department of Motor Traffic (DMT) has a counter in the arrival walkway, next to the SPAR supermarket, making it convenient to complete the process before leaving the airport.
If you’re planning to rent a car, motorcycle or scooter, we highly recommend completing this step immediately after arrival instead of searching for the office later in Colombo.
It saves both time and unnecessary travel.
What Documents Do You Need?
When we looked into the requirements before travelling, the process turned out to be quite simple.
You’ll need:
- Your original passport
- A valid Sri Lanka visa/ETA
- Your original full driving licence from your home country
- If your licence isn’t in English, an official English translation is required.
One important requirement that many travellers miss is that your home driving licence should generally be valid for at least one year from the date of conversion.
How Much Does It Cost?
At the time of writing, the official fee is:
- LKR 15,000 for a 1-month temporary driving licence.
Longer validity periods are available if you’re staying longer.
The permit is issued for motorcycles and light vehicles and can be used during your stay, subject to the licence validity and visa period.
How Long Does It Take?
Most travellers report that the process is surprisingly quick.
If there isn’t a long queue, it usually takes around 15–20 minutes. Even recent traveller experiences suggest the process is fairly smooth.
If you’re planning to self-drive throughout Sri Lanka, spending those extra few minutes at the airport is absolutely worth it.
Planning to Rent a Tuk-Tuk?
This is where many travellers get confused.
Driving a tuk-tuk (three-wheeler) follows different rules.
The airport-issued temporary driving licence does not automatically allow you to drive a tuk-tuk. It covers motorcycles and light vehicles, but not three-wheelers.
If your dream is to explore Sri Lanka in a tuk-tuk (which has become increasingly popular among backpackers), you’ll usually need to arrange the required permit through an authorised rental company or follow the latest guidance from the Sri Lankan tourism authorities, as the process has changed over time and has occasionally been suspended or revised.
Our advice?
Before booking a tuk-tuk online, ask the rental company these two questions:
- Will you arrange the required permit?
- Is there anything I need to complete before arriving?
That simple email can save you a lot of confusion later.
We Chose App-Based Taxis Instead
Although we enjoy driving during many of our trips, for this Sri Lanka itinerary we decided not to rent a vehicle immediately.
After a long flight, we simply wanted to reach our hotel comfortably.
And honestly…
It turned out to be a great decision.
Avoid Booking a Taxi Inside the Airport
As soon as you walk into the arrival hall, you’ll notice several taxi drivers offering rides.
Some are official airport taxis.
Others are independent drivers approaching tourists.
They’ll often ask questions like:
“Taxi?”
“Where are you going?”
“Best price!”
This happens at airports all over the world, and Colombo is no exception.
While some drivers are genuine, we found that the prices they quoted were noticeably higher than app-based taxis.
Instead of negotiating after a tiring flight, we simply opened our phone and booked through an app.
It was easier, transparent and much cheaper.
Uber or PickMe? Which One Should You Use?
Sri Lanka has two popular ride-hailing apps:
- Uber
- PickMe
We installed both before travelling.
Sometimes Uber was cheaper.
Sometimes PickMe offered a better fare.
It only takes a few seconds to compare prices between the two.
If one app has surge pricing, simply check the other.
That small habit can save quite a bit of money over the course of your trip.
Both apps allow you to see the fare before confirming your ride, so there’s no need to bargain or worry about unexpected charges.
For us, that peace of mind was worth a lot after a long international flight.
A Small Tip That Saved Us Money
Before booking your ride, make sure your Dialog SIM is already working.
Having mobile data immediately after leaving the airport made everything easier.
We could:
- Book a cab.
- Contact our hotel.
- Navigate using Google Maps.
- Check exchange rates.
- Inform our family that we had landed safely.
It’s one of those small things you don’t appreciate until you actually need it.
Our First Ride Through Sri Lanka
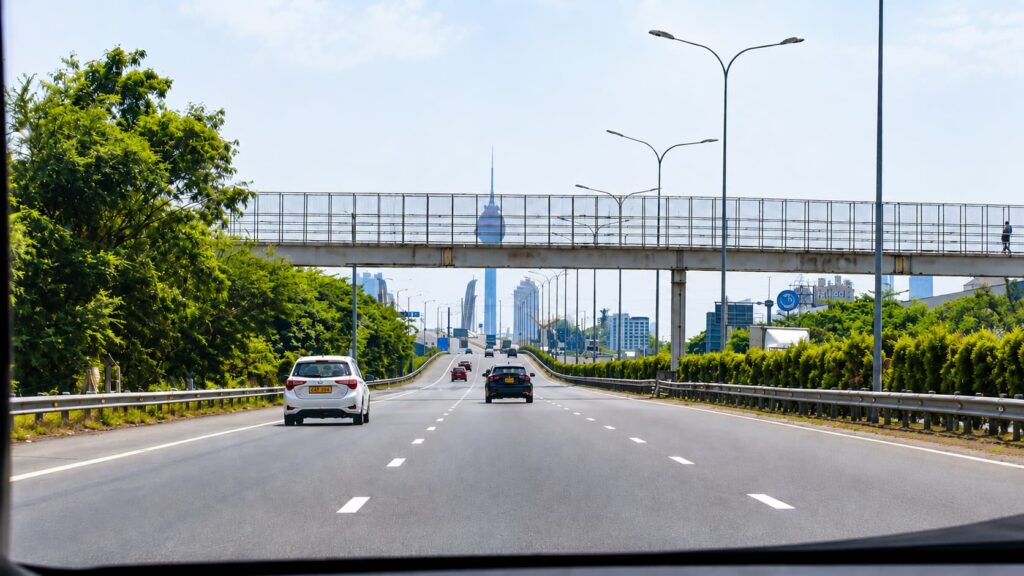
Once our driver accepted the booking, we walked to the pickup point outside the terminal.
The weather immediately felt different.
Warm.
Humid.
And unmistakably tropical.
Palm trees lined the roads, colourful buses passed by, and within minutes we were experiencing Sri Lanka for the very first time—not through YouTube videos or Instagram reels, but through the car window.
That first drive from the airport felt special.
After months of planning, visa applications and itinerary research, we could finally relax.
Our holiday had officially begun.
5 Things We Recommend Doing Before Leaving Colombo Airport
Before stepping outside the airport, here’s a quick checklist we’d suggest:
✅ Withdraw or exchange enough Sri Lankan Rupees for your first couple of days.
✅ Buy a local Dialog SIM card and make sure mobile data is working.
✅ Apply for a temporary driving licence if you’re planning to rent a car or scooter.
✅ Download both Uber and PickMe and compare fares before booking.
✅ Keep your passport, immigration stamp and baggage tags handy until you’re completely out of the airport.
Once you’ve completed these steps, you’re ready to begin exploring one of the most beautiful countries in South Asia.
Things to Be Careful About at Colombo Airport
Our arrival at Bandaranaike International Airport (Colombo Airport) was smooth from start to finish, but there are still a few things we’d recommend keeping in mind to avoid unnecessary stress.
These aren’t meant to scare you—just a few practical tips that made our journey easier.
1. Beware of Fake ETA Websites
This is probably the biggest mistake travellers make before they even reach Sri Lanka.
If you search “Sri Lanka Visa” on Google, you’ll find several websites that look official.
Some even use the Sri Lankan flag and government-style logos.
Many of these websites charge two or three times more than the official visa fee simply for submitting the same application on your behalf.
Always double-check the website address before making any payment.
The official Sri Lanka ETA website is https://www.eta.gov.lk
If you’re unsure, don’t rush.
Take a minute to verify that you’re on the official government website.
2. Keep Your Important Documents Easily Accessible
Don’t pack your passport, visa confirmation or hotel bookings inside your checked luggage.
Although our immigration process was quick and straightforward, officers have the right to ask for supporting documents if required.
We kept everything inside a small travel folder in our cabin bag.
It only takes a few seconds to show your documents when they’re organised.
3. Don’t Rush Through the Airport
Many travellers leave the airport as quickly as possible.
We almost did the same.
But taking an extra 20–30 minutes inside the airport actually saves time later.
Before leaving, make sure you’ve:
- Withdrawn local currency.
- Purchased your SIM card.
- Activated mobile data.
- Booked your transport.
- Collected all your luggage.
Completing these tasks inside the airport means you won’t have to search for ATMs or SIM shops after reaching your hotel.
4. Compare Taxi Prices Before Booking
Airport taxi drivers are available immediately outside the terminal.
Some quotes may be reasonable.
Others can be significantly higher than app-based services.
Before accepting any offer, simply open Uber and PickMe and compare the prices.
It takes less than a minute and could save you a good amount of money, especially if you’re travelling longer distances.
5. Don’t Exchange All Your Money at Once
Although Colombo Airport offers competitive exchange rates, we still wouldn’t recommend converting all your travel money immediately.
Exchange enough for your first few days.
If needed, you can always withdraw more cash later using ATMs in major cities like Colombo, Kandy, Ella, Galle or Mirissa.
This gives you flexibility if exchange rates improve or your spending changes during the trip.
Airport Facilities You’ll Find
One thing we appreciated about Colombo Airport was that almost everything a traveller needs is available in one place.
You’ll find:
✔ Currency exchange counters
✔ International ATM machines
✔ Dialog and other SIM card providers
✔ Duty-free shopping
✔ Food and beverage outlets
✔ Restrooms
✔ Tourist information counters
✔ Car rental services
✔ Taxi booking counters
✔ Temporary driving licence counter
The airport isn’t overwhelmingly large, so moving between these facilities is quite easy.
Even if it’s your first international trip, you shouldn’t find the airport confusing.
Mistakes First-Time Travellers Should Avoid
Looking back, here are a few mistakes we’d tell our friends to avoid.
❌ Booking a visa through an unofficial website
Always use the government portal.
❌ Skipping the local SIM card
Having internet immediately after landing made everything easier—from booking taxis to finding restaurants.
❌ Accepting the first taxi offer
Compare Uber and PickMe first.
❌ Forgetting cash
Cards are accepted in many places, but cash is still useful for tuk-tuks, local eateries and small shops.
❌ Waiting until later to get a driving permit
If you’re planning to rent a car or scooter, complete the permit process at the airport itself. It’ll save you time later.